Step-by-Step Guide: BYOK Integration with Azure Key Vault
The LeapXpert Communications Platform integrates with a customer-managed Azure Key Vault for BYOK (Bring Your Own Key), enabling secure encryption and decryption of sensitive communication data.
This guide provides step-by-step instructions for configuring Azure Key Vault, creating a customer-managed key, and integrating it with LeapXpert.
Before you start
- Review the BYOK concept and how it works within the LeapXpert platform. See: Configure Bring Your Own Key (BYOK) protection (internal link).
- To enable authentication, understand how to generate certificates from the LeapXpert Admin Portal. See: Generate certificate credential keys for Microsoft Entra ID app registration (internal link). The certificate generation step is required before proceeding.
Note
The certificate generation step is required before proceeding to the configuration section below.
Configure BYOK integration with Azure Key Vault
Create an App Registration in Entra ID (2)
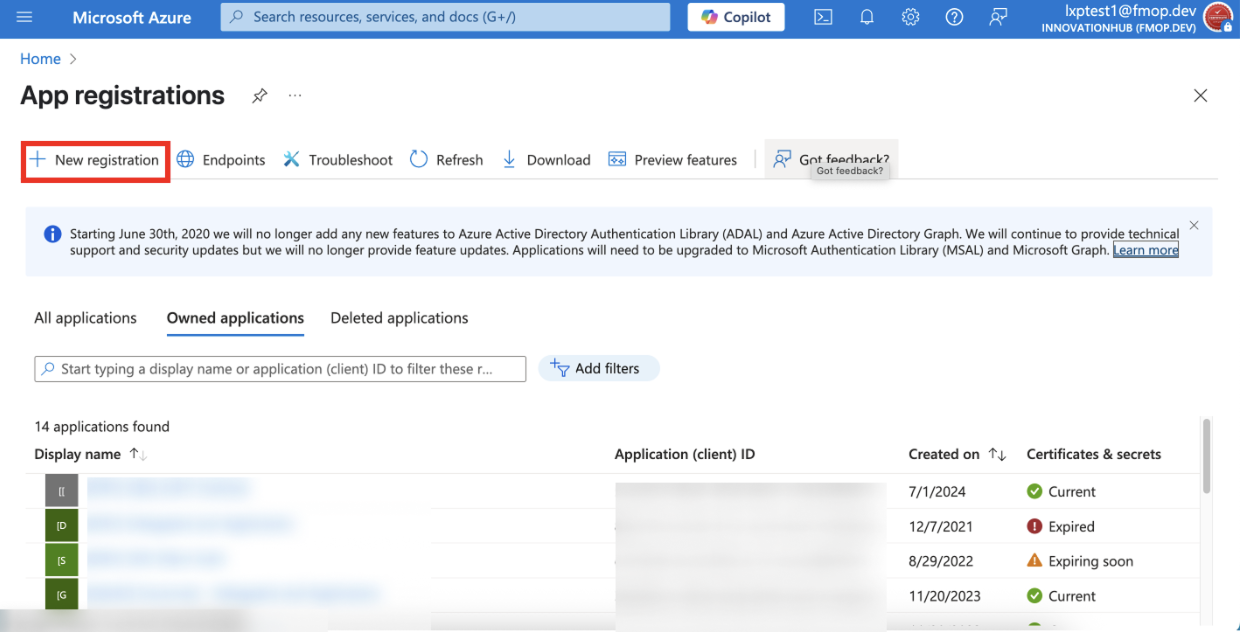
- Log in to Microsoft Entra Admin Center.
- Go to App registrations.

- Click + New registration.
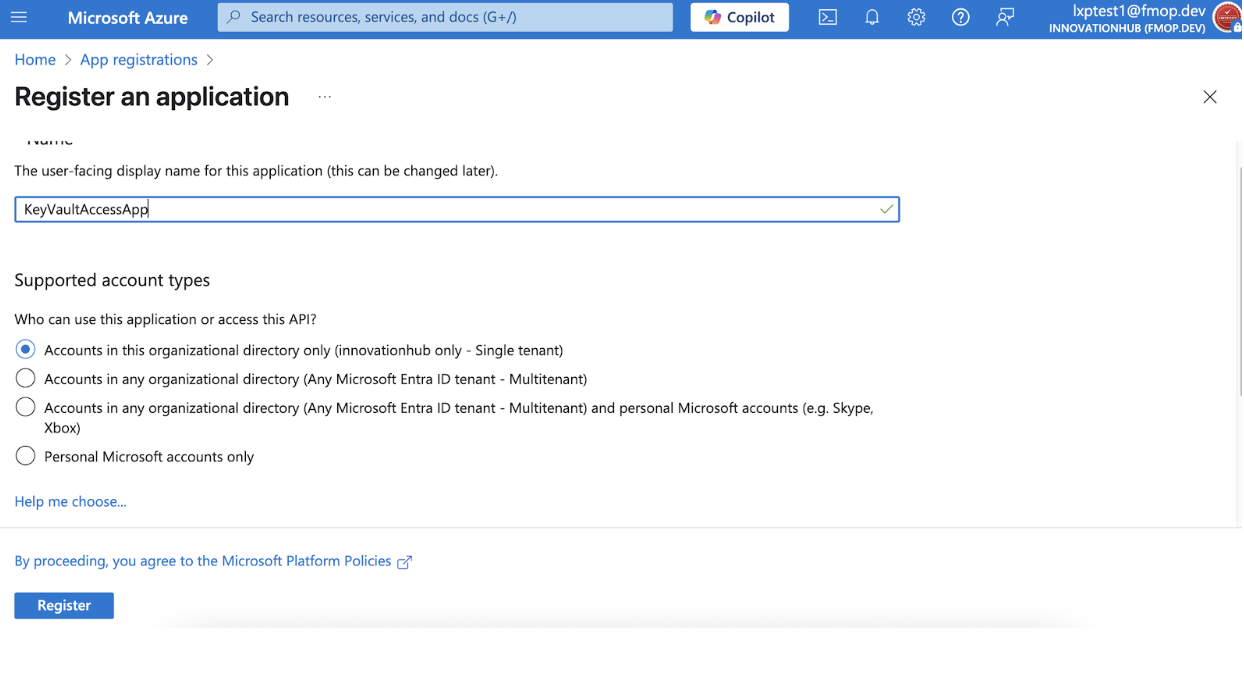
- Fill in:
- Name: e.g.,
KeyVaultAccessApp - Supported account types: Accounts in this organizational directory only (Single tenant)
- Redirect URI: Leave blank (or set if required by your app)
- Name: e.g.,
- Click Register.
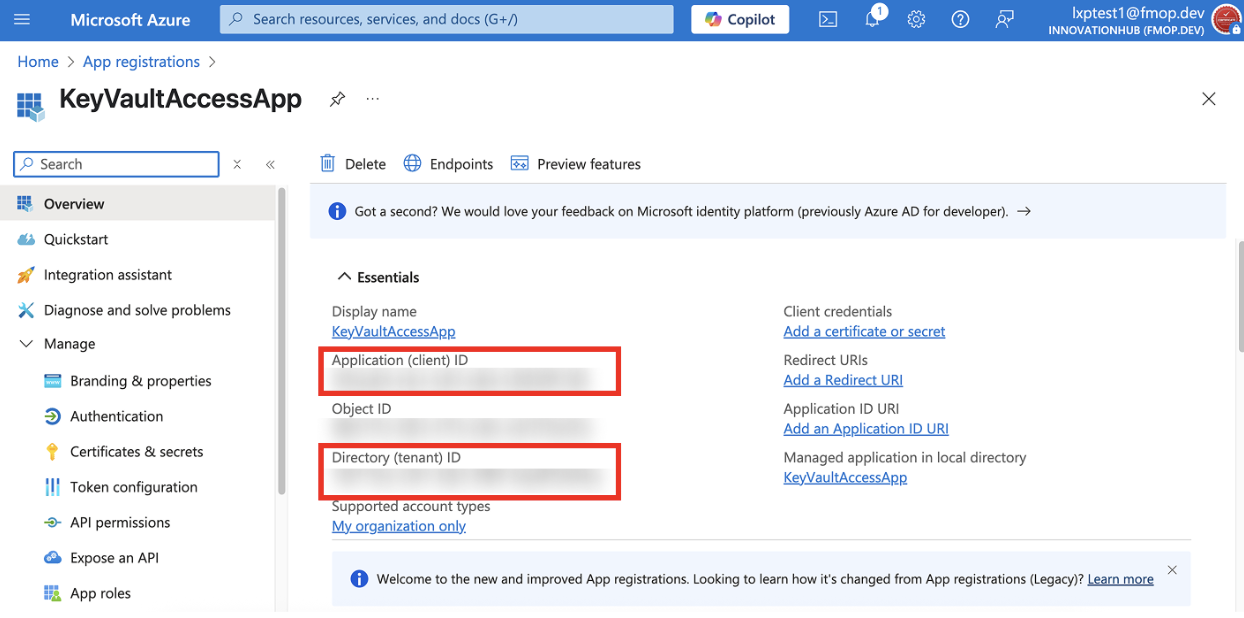
- Copy the Application (Client) ID and Directory (Tenant) ID for later use.
- Go to Certificates & secrets and choose one of the following:
Option 1: Authenticate App using Certificates
- Under Certificates, click Upload certificate (or Update certificate).
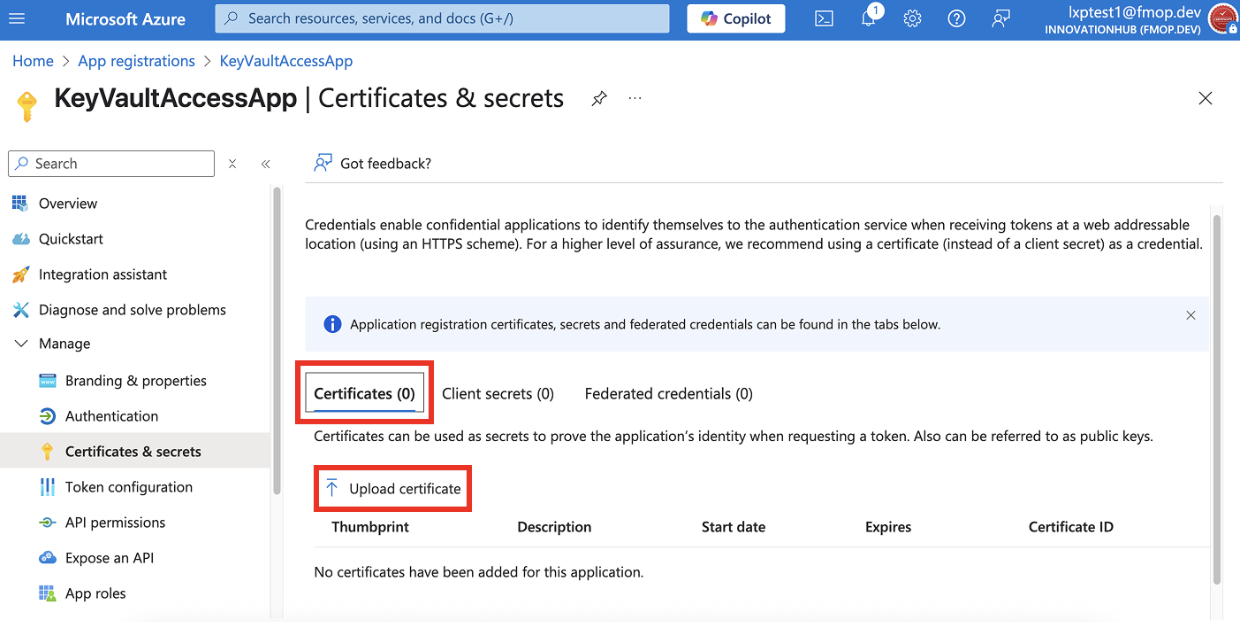
- Click Select file and upload the certificate downloaded from the LeapXpert Org Admin portal.
- (Optional) Enter a description.

- Click Add.
Option 2: Authenticate App using Client secrets
- Go to Certificates & secrets.
- Click Client secrets > + New client secret.
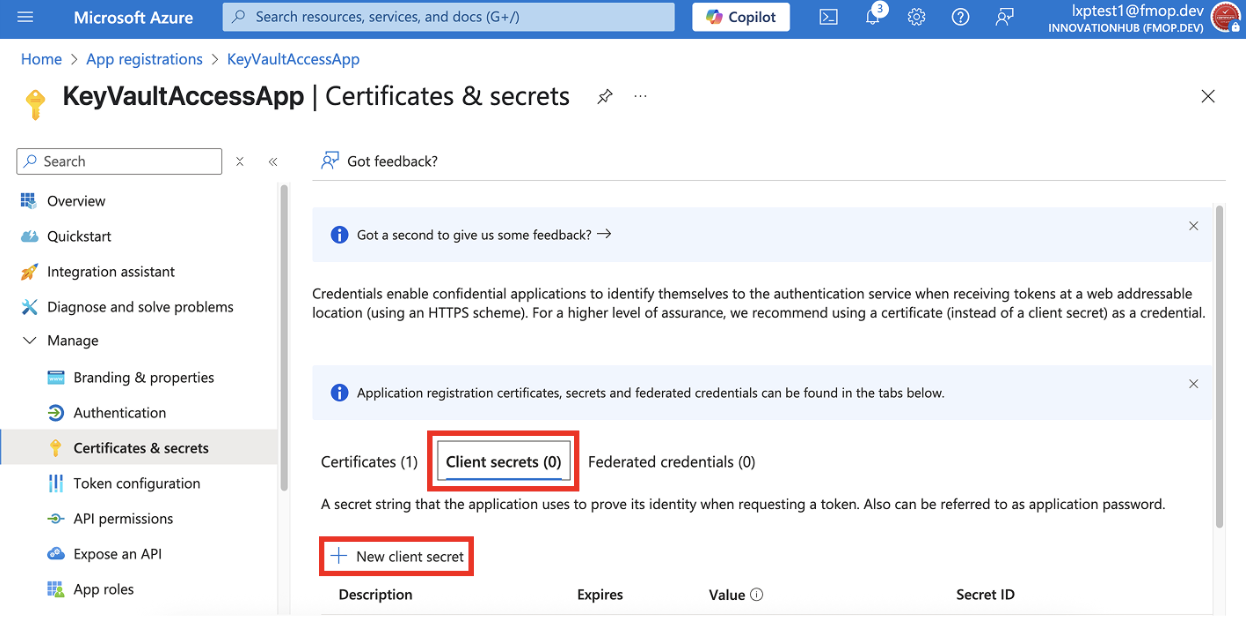
- Enter a description and select an expiration period.
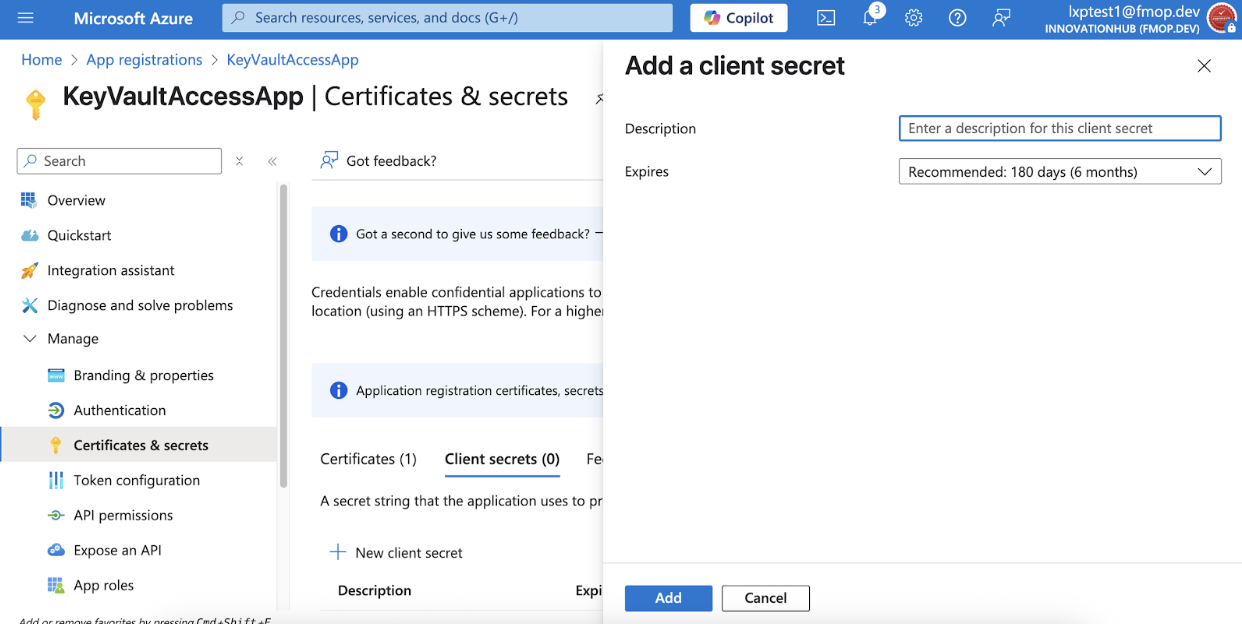
- Click Add.
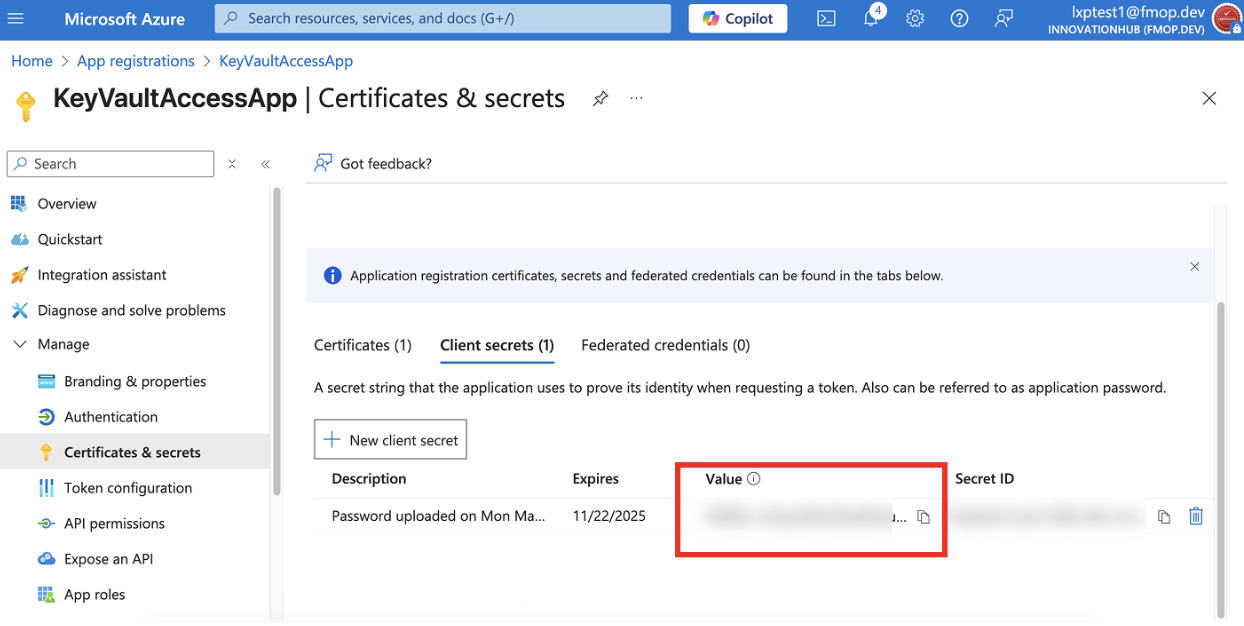
- Copy the Value of the secret (you’ll use it for authentication).
Recommendation
Use Option 1 (Certificates) to authenticate the App Registration.
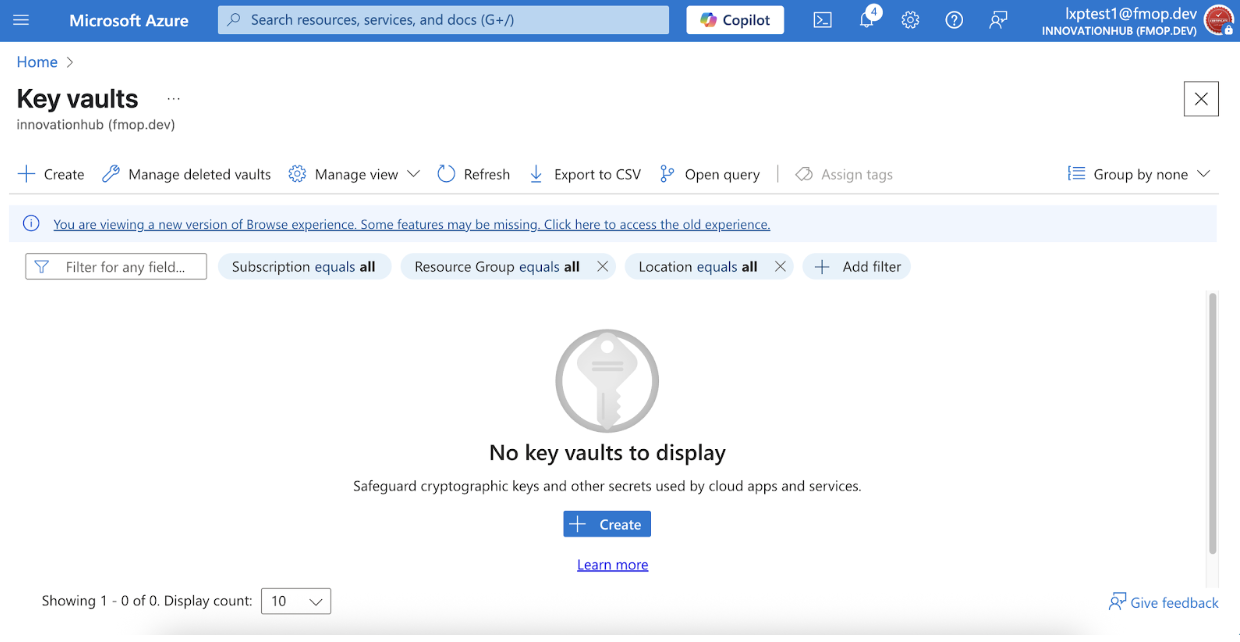
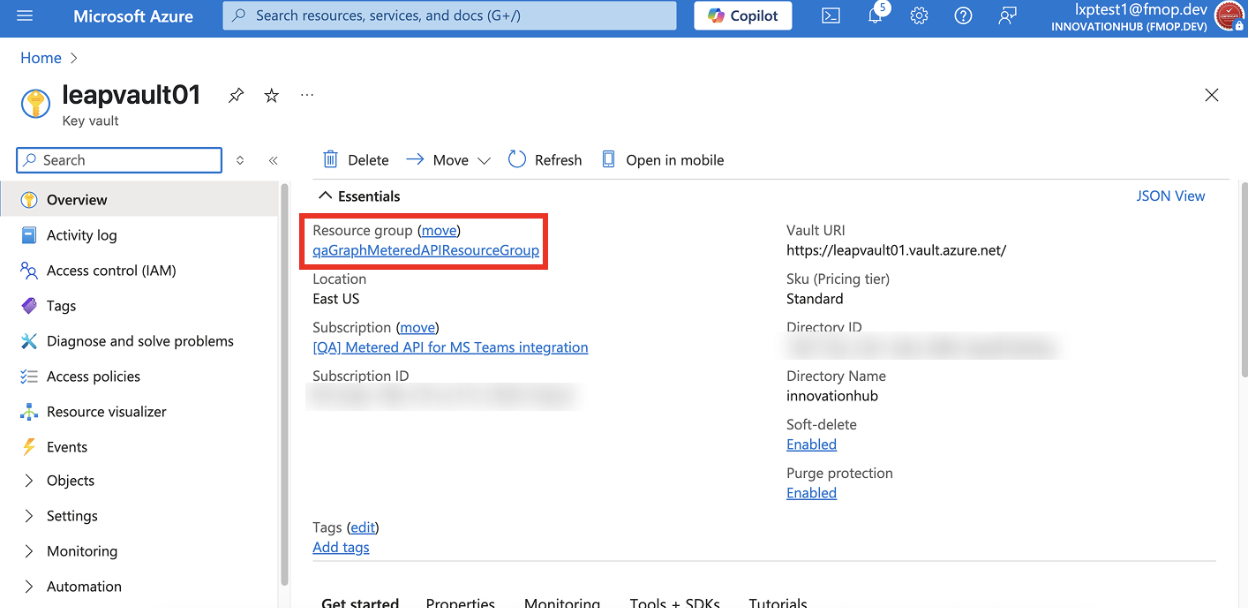
Create an Azure Key Vault
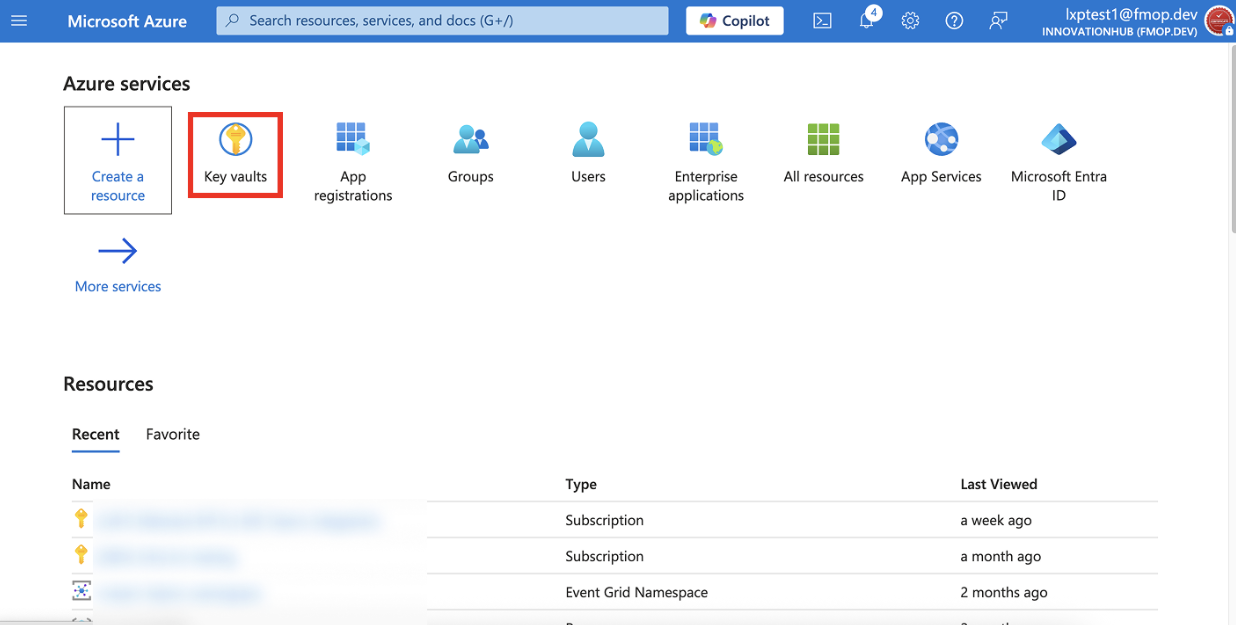
- Log in to the Azure Portal.
- Select Key vaults.
- Click + Create.
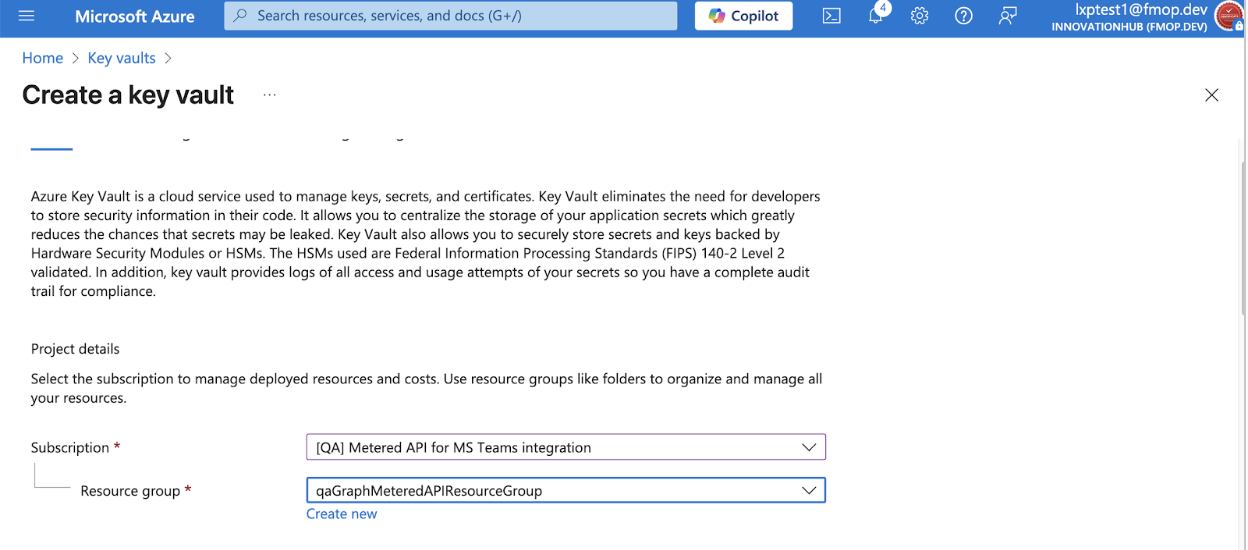
- Fill in the required details:
- Subscription: Choose your subscription.
- Resource Group: Select or Create new.
- Key Vault Name: e.g.,
leapvault01(must be globally unique).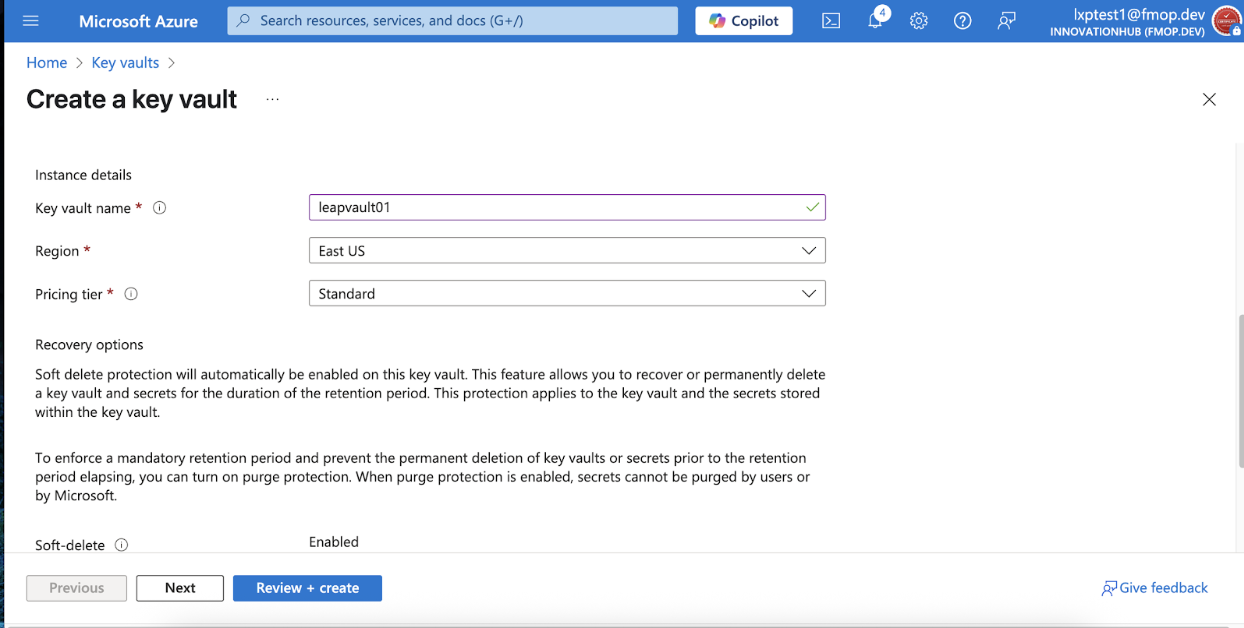
- Region: Select your region.
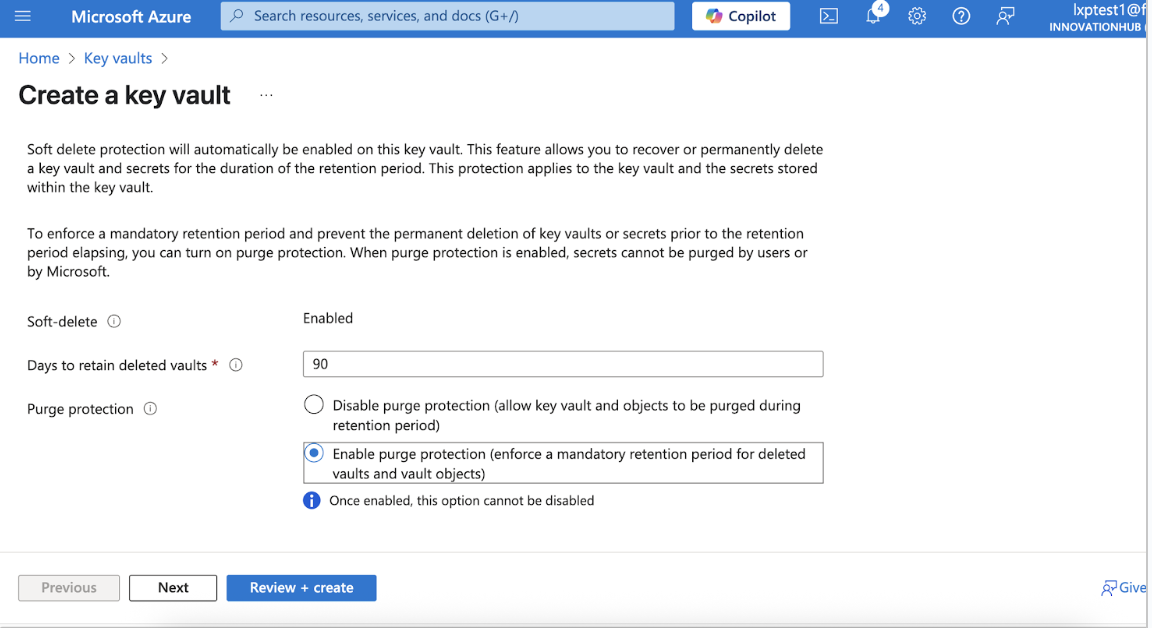
- Enable Soft-delete and Purge Protection:
- Soft Delete: Ensure it is enabled. This ensures deleted keys can be recovered within the retention period.
- Retention Period: 90 days (default).
- Purge Protection: Enable purge protection to prevent permanent deletion before the retention period ends.
- Click Review + Create, then Create.
Note
To prevent data loss, enable soft delete (90-day retention) and purge protection in Azure Key Vault. This ensures customer-managed keys can be recovered if deleted, maintaining secure and uninterrupted access to encrypted data in LeapXpert.
Create a custom role for Key Vault operations
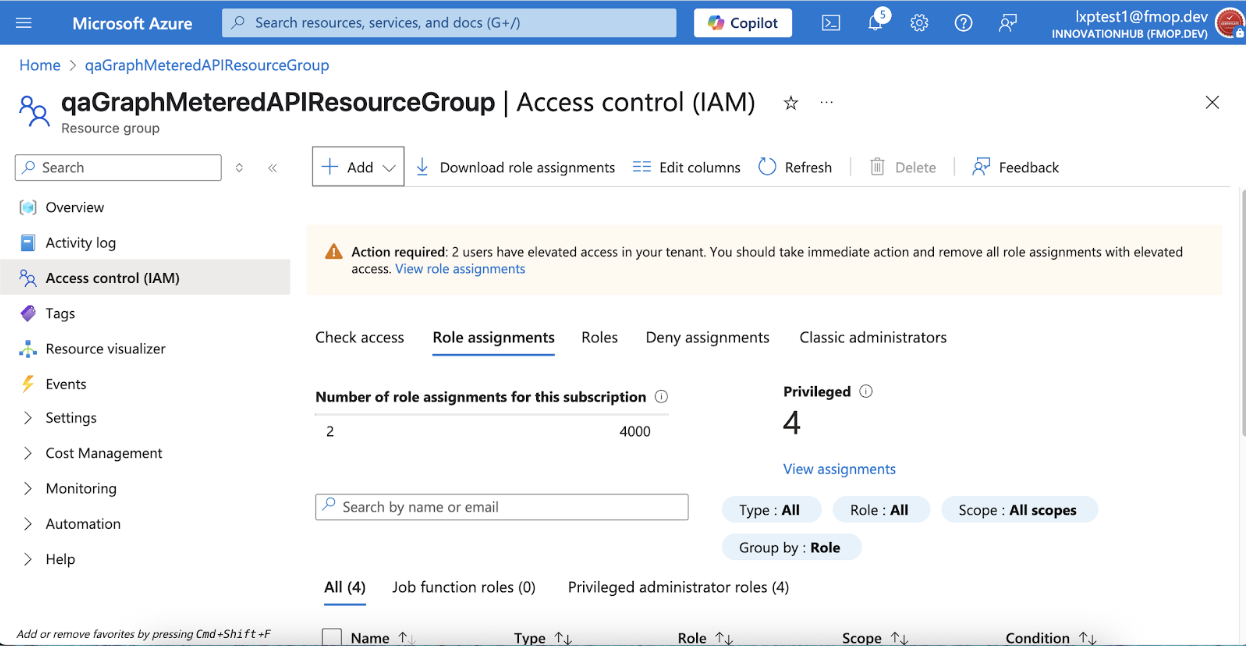
- In the Azure Portal, navigate to the Resource Group that contains your Key Vault.
- Click Access control (IAM).
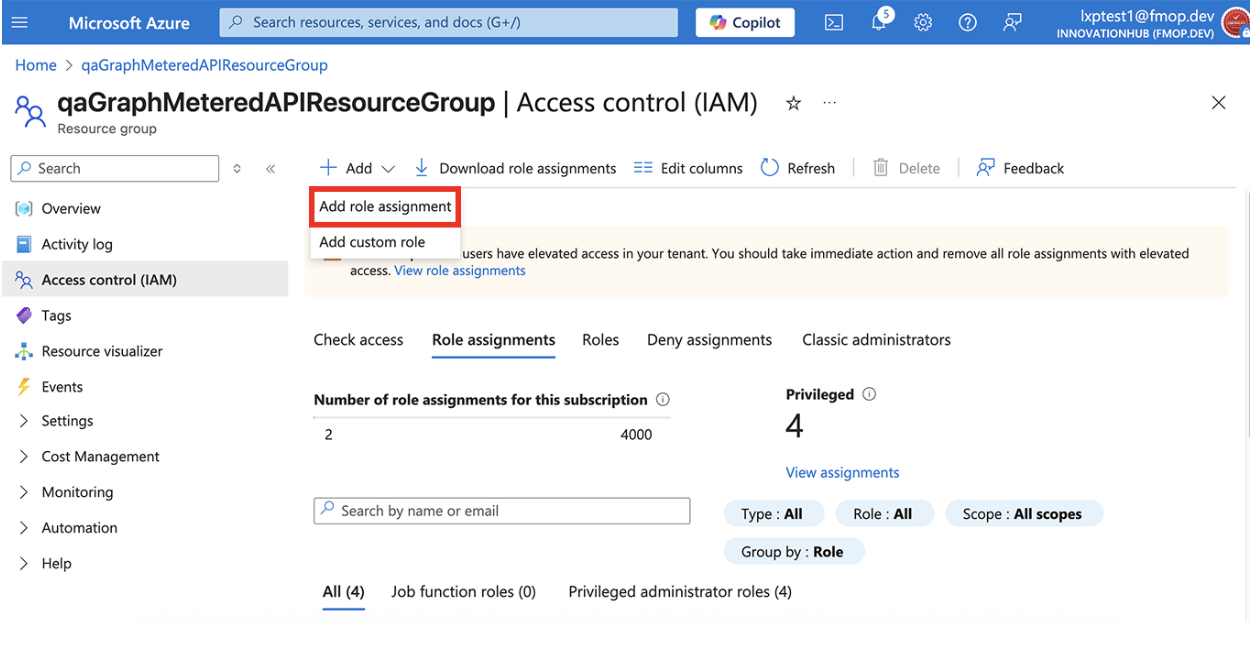
- Click Add.

- Click Add custom role.
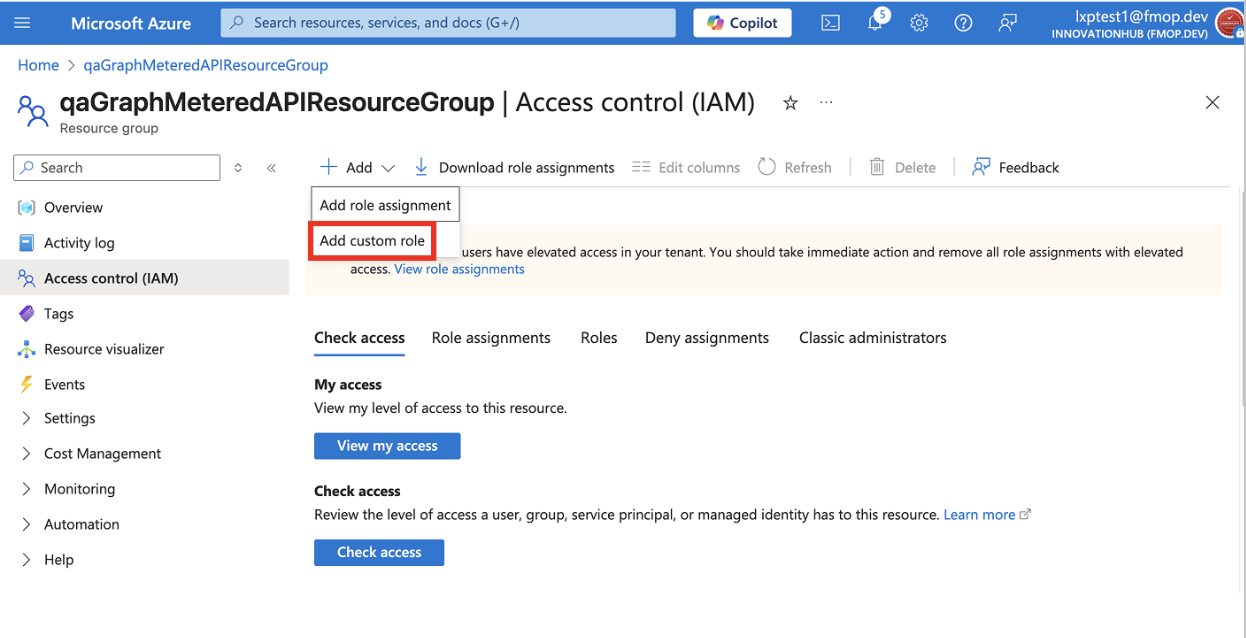
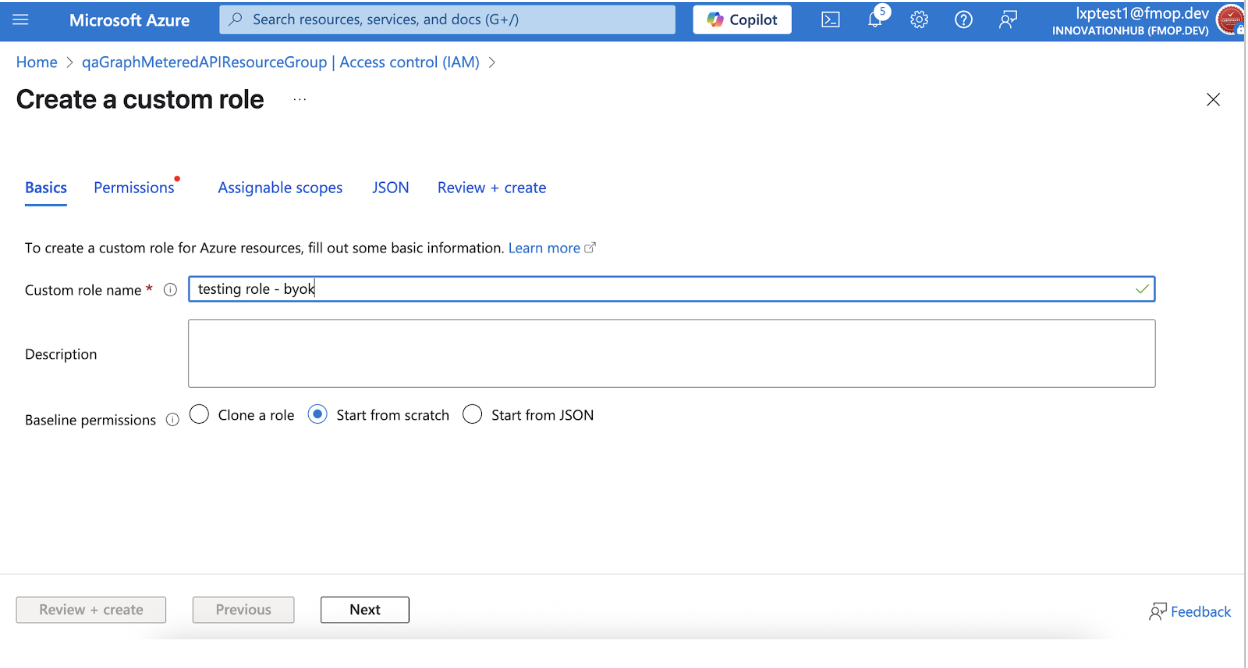
- Enter a Custom role name and select Start from scratch.
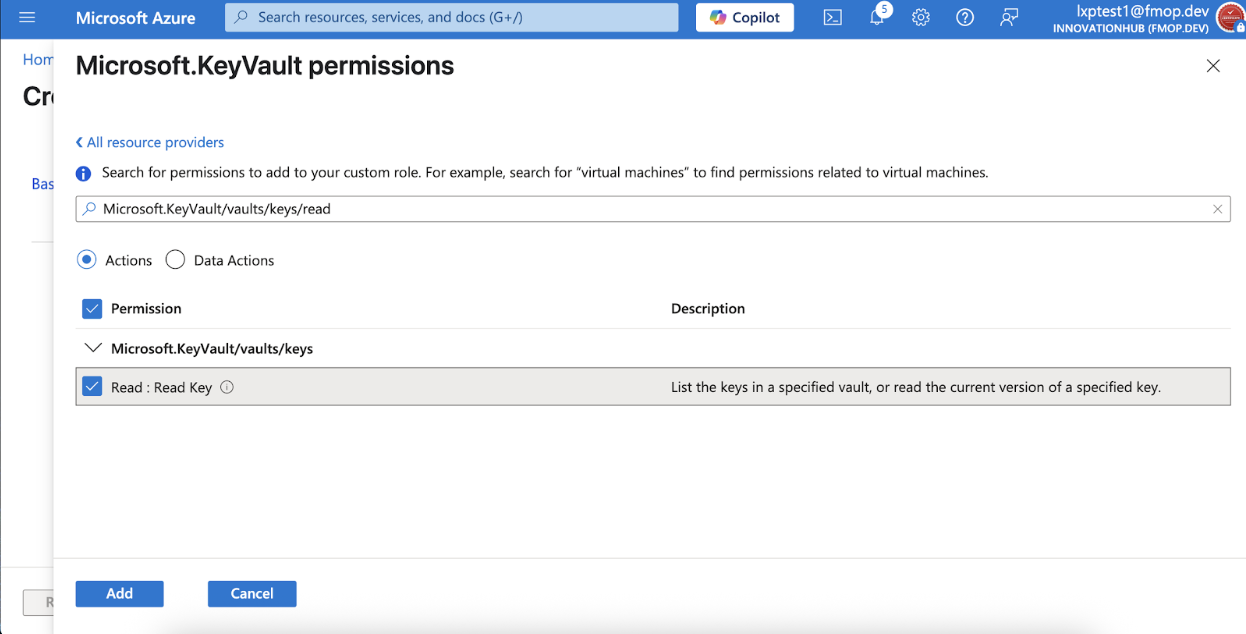
- Open the Permissions tab and click Add permissions.
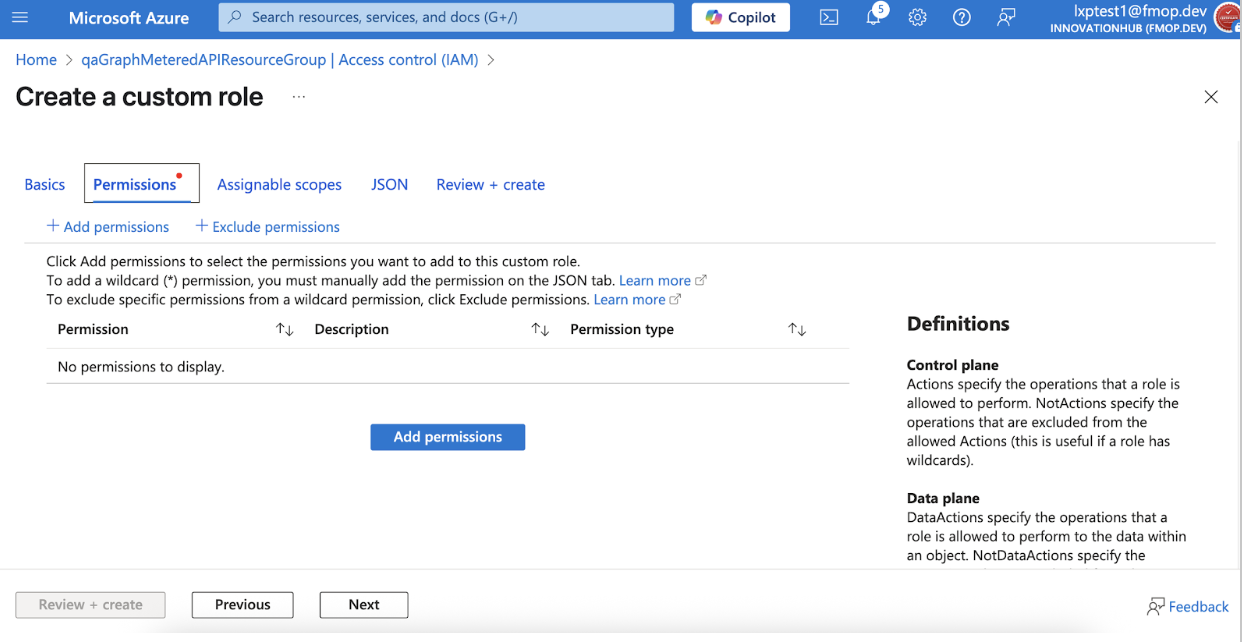
- Search for the following permissions and add them:
Microsoft.KeyVault/vaults/keys/read(Actions)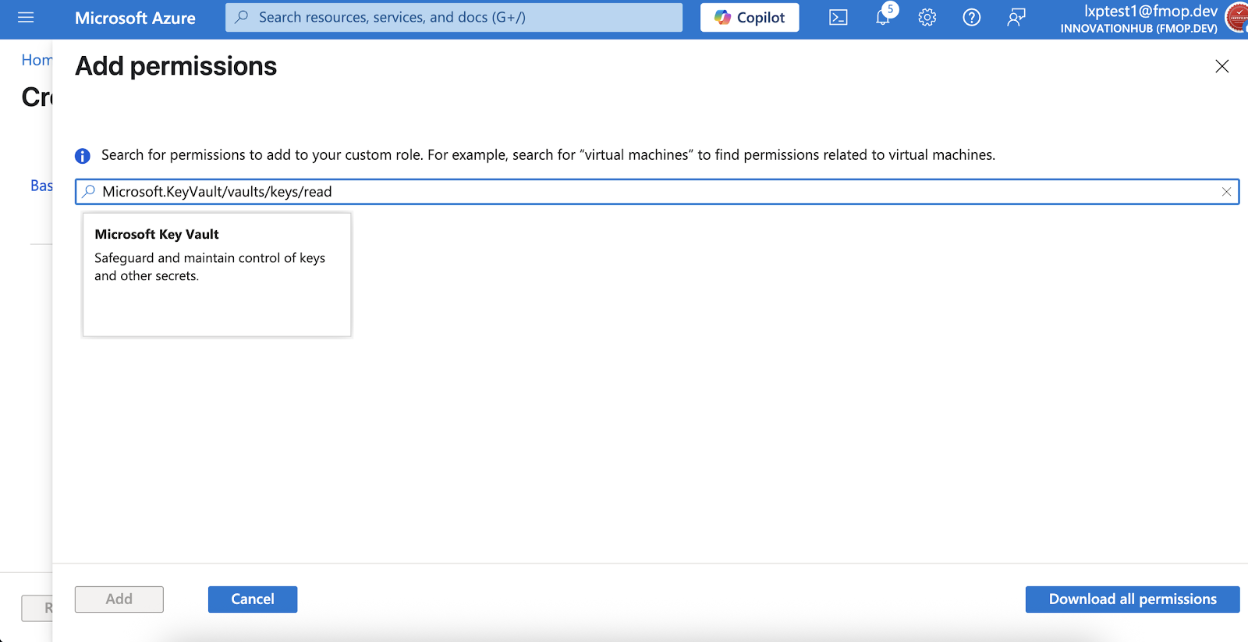
- Click Add.
- Under Data actions, repeat the above steps to those permissions:
Microsoft.KeyVault/vaults/keys/readMicrosoft.KeyVault/vaults/keys/encrypt/actionMicrosoft.KeyVault/vaults/keys/decrypt/action
- Click Review + create, then Create.
Create role assignment to Key Vault
- In your Key Vault, go to Access control (IAM).
- Select Role assignments.
- Click + Add > Add role assignment.
- In Role, select the custom role you created.
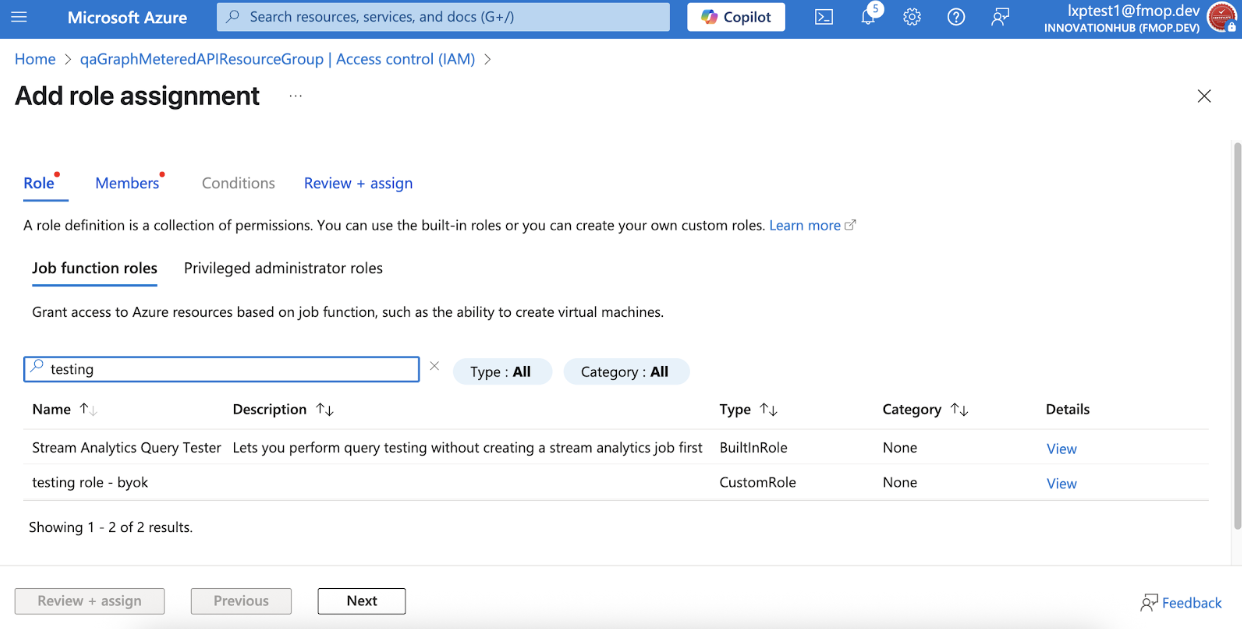
- Click Next.
- In the Members field, next to Assign access to, select User, group, or service principal.
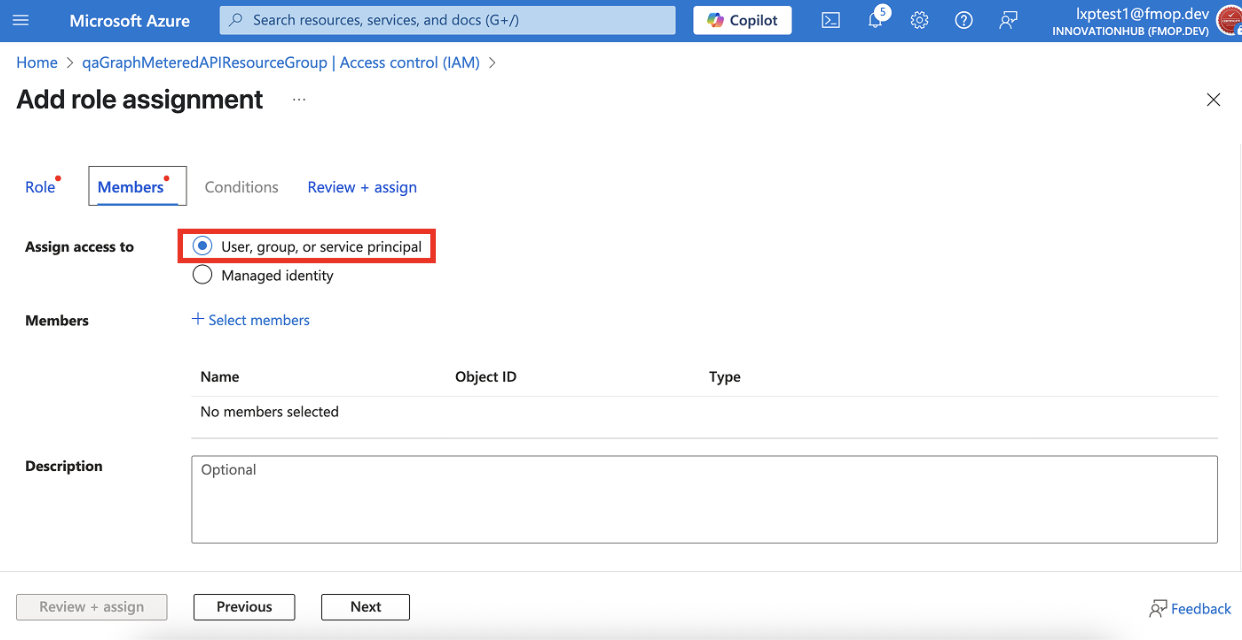
- Click + Select members and choose the App Registration you created earlier (2).
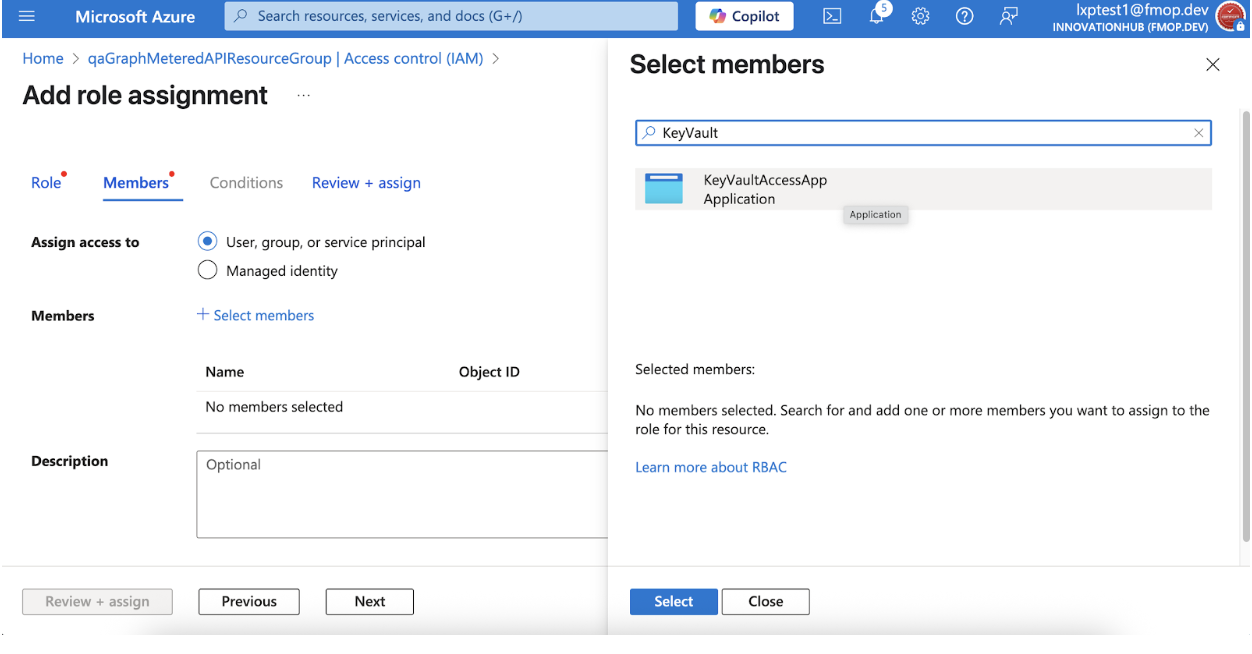
- Click Select.
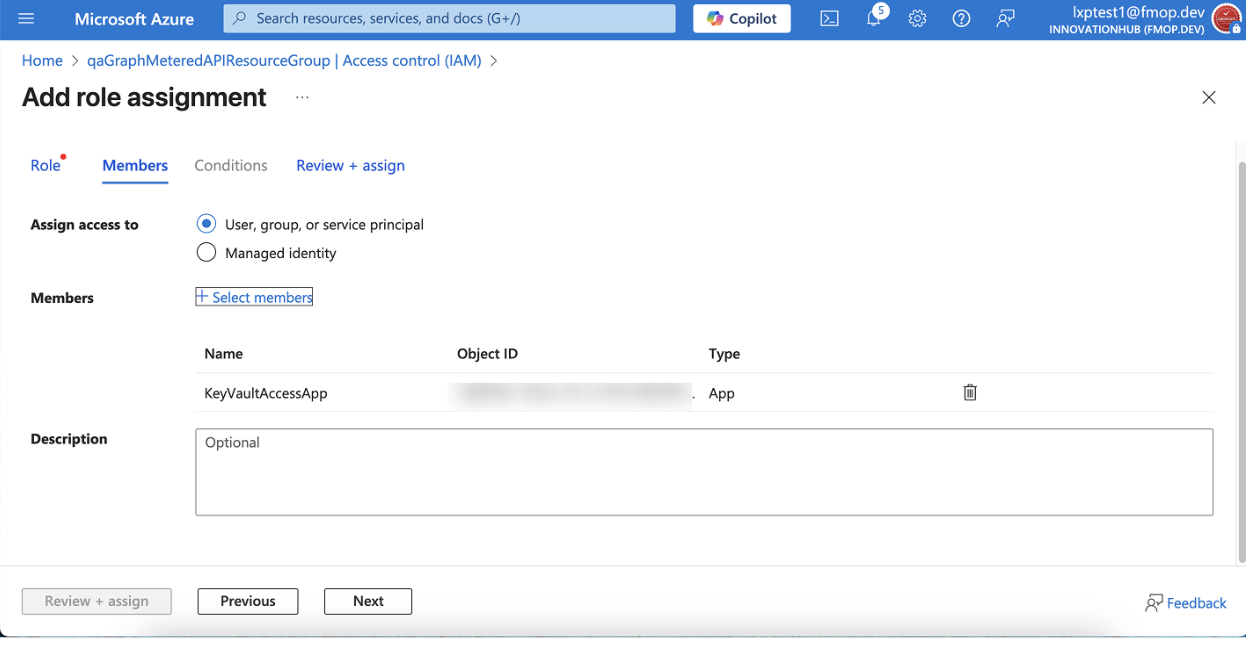
- Click Next.
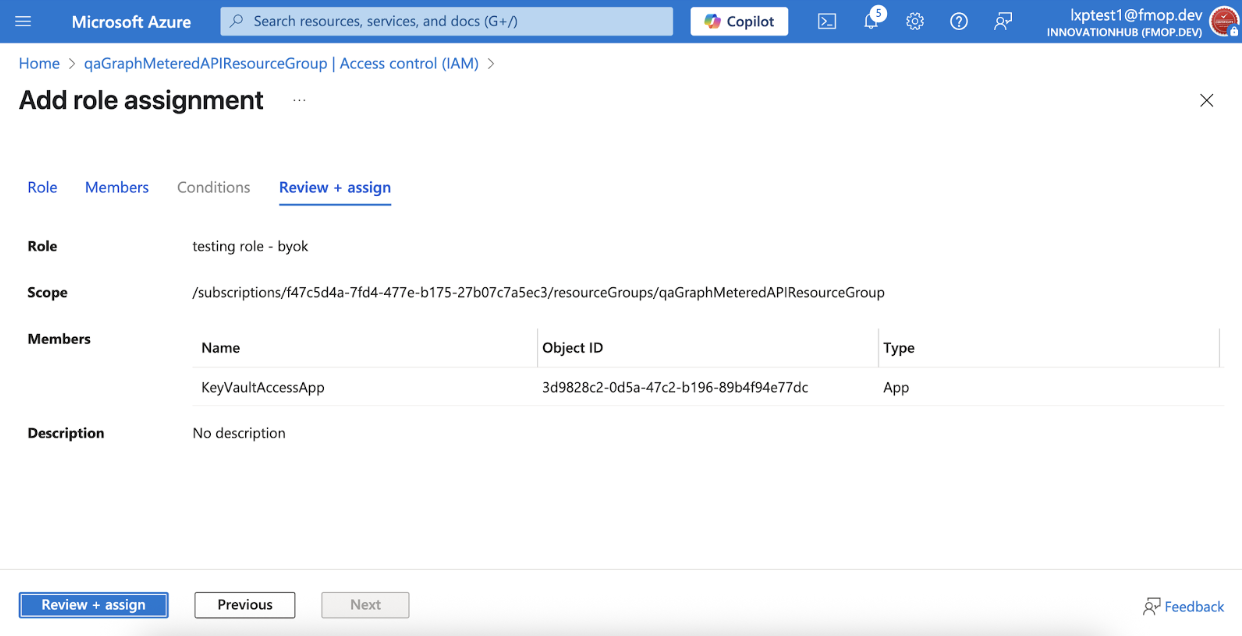
- Click Review + assign.
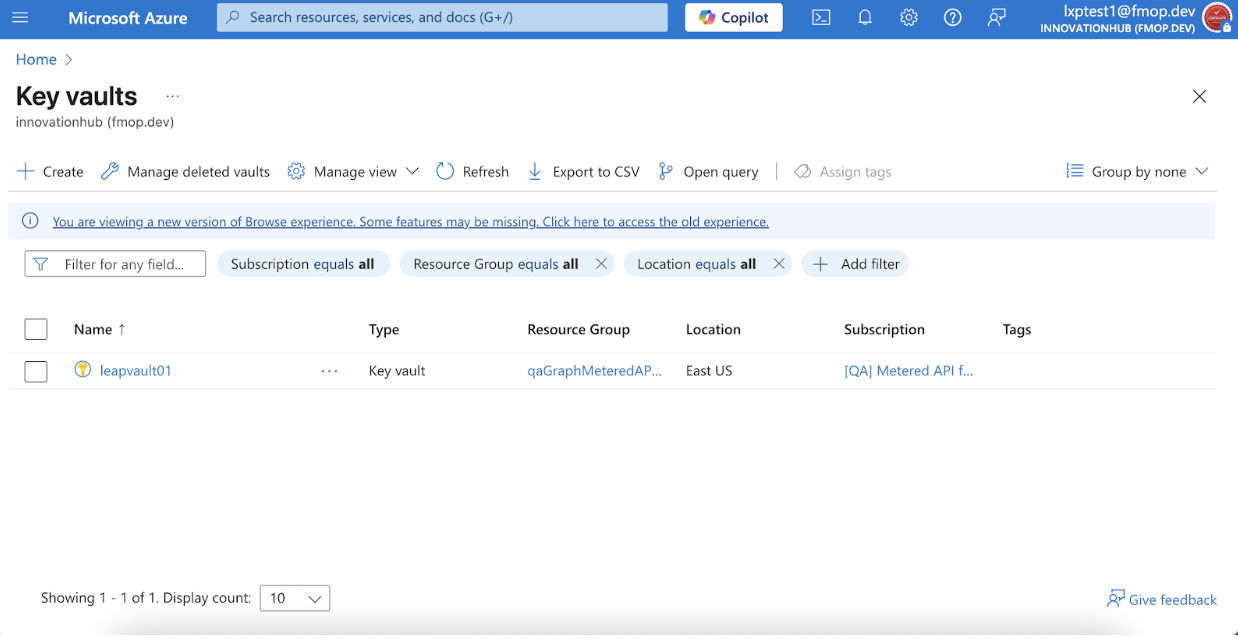
Create a Key
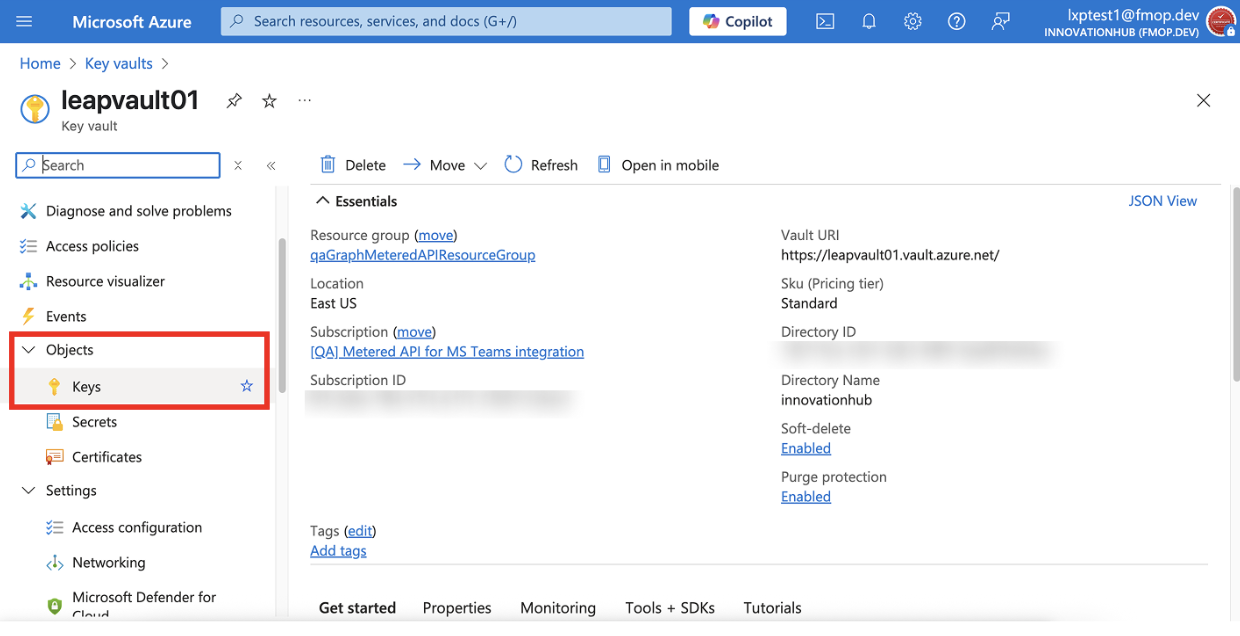
- In Azure Portal > Key vaults, select your Key Vault.
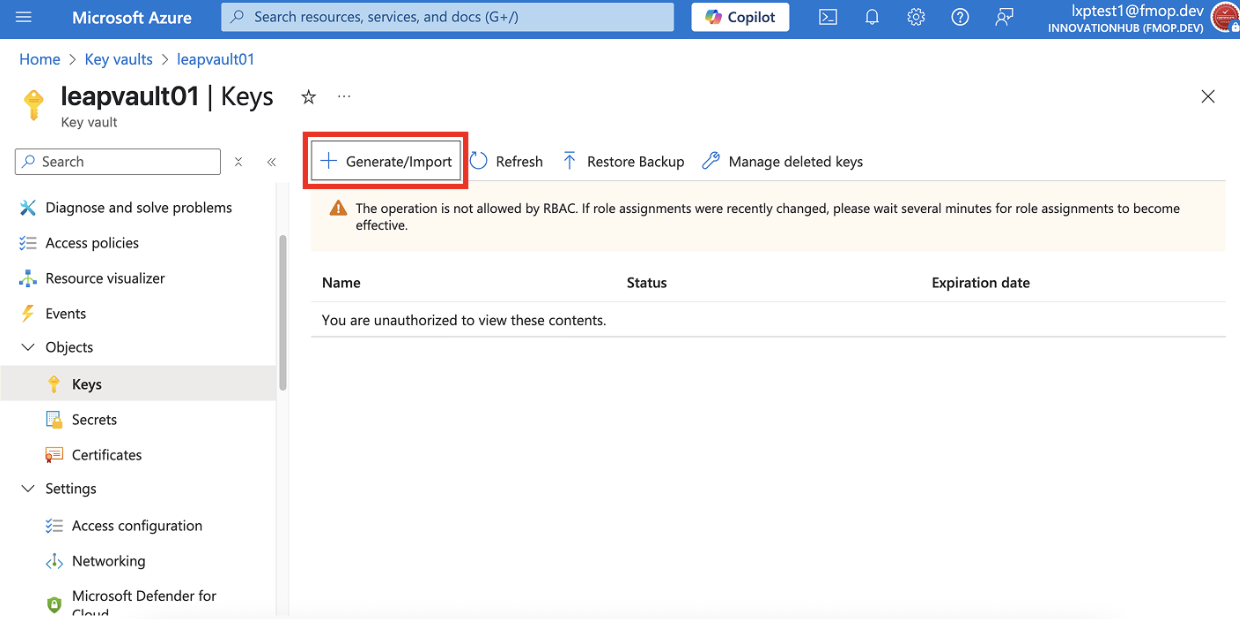
- In the left navigation, go to Objects > Keys.
- Click + Generate/Import.
- Select Generate from the dropdown list.
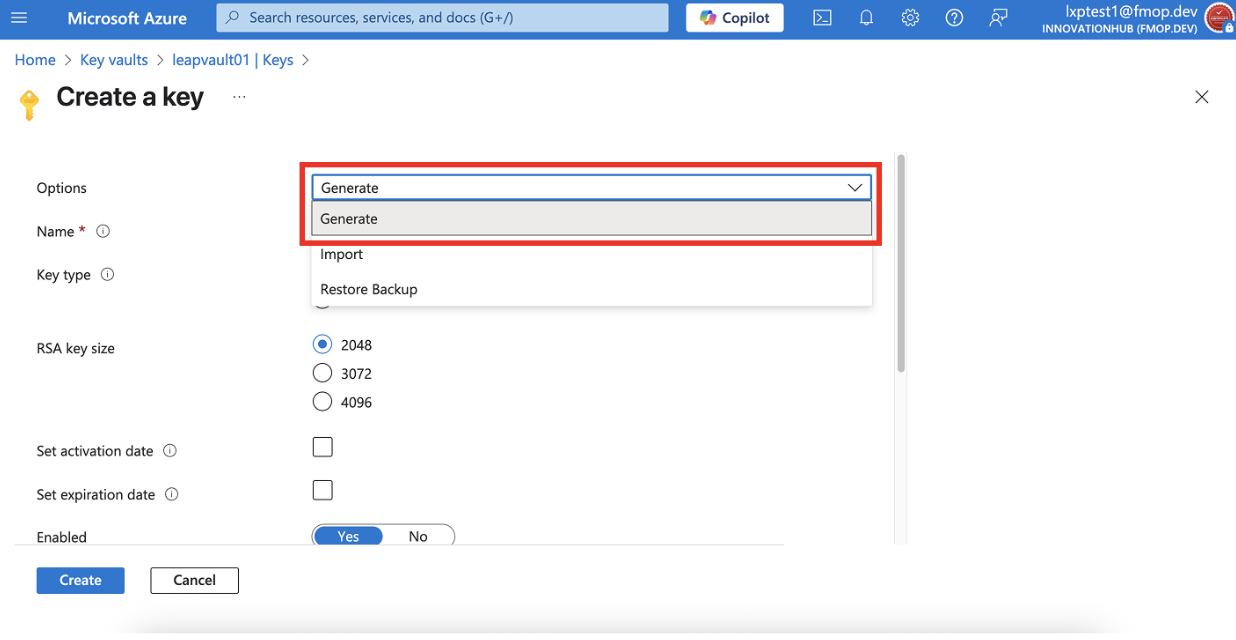
- Enter a Key name.
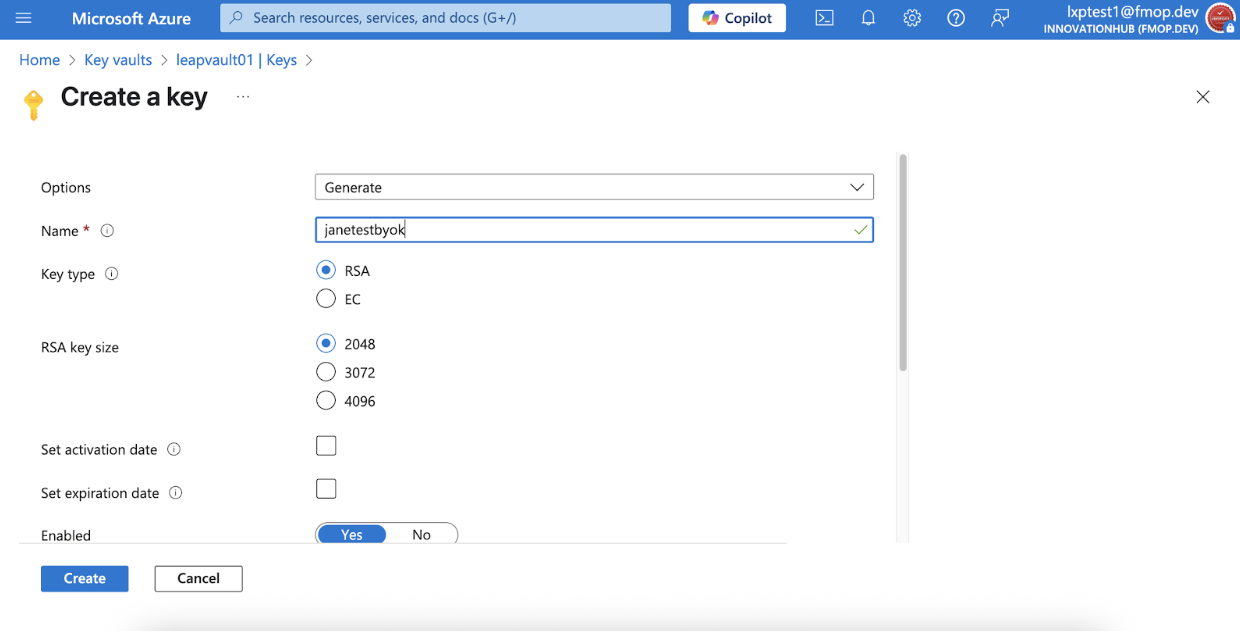
- Configure:
- Key type:
RSA. - Key size:
4096(recommended). - Activation/Expiration dates: Optional.
- Key type:
- Click Create.
- Copy the Key Identifier (URI) in the format:
https://<key-vault-name>.vault.azure.net/keys/<key-name>/<key-version>
Configure in the LeapXpert Org Admin portal
Private Link is a secure, private connection that keeps your data exchange with LeapXpert entirely within Microsoft’s network (not over the public internet).
Option A — Without Private Link
Summary of required values (prepare these for configuration in LeapXpert):
| Attribute | Value |
|---|---|
| Key Name | <my-encryption-key> |
| Key Vault URI | https://<key-vault-name>.vault.azure.net |
| App Registration ID | <Application (Client) ID> |
| Tenant ID | <Directory (Tenant) ID> |
| Client Secret | <Client Secret Value> (Optional, if using secret) |
Configure in LeapXpert:
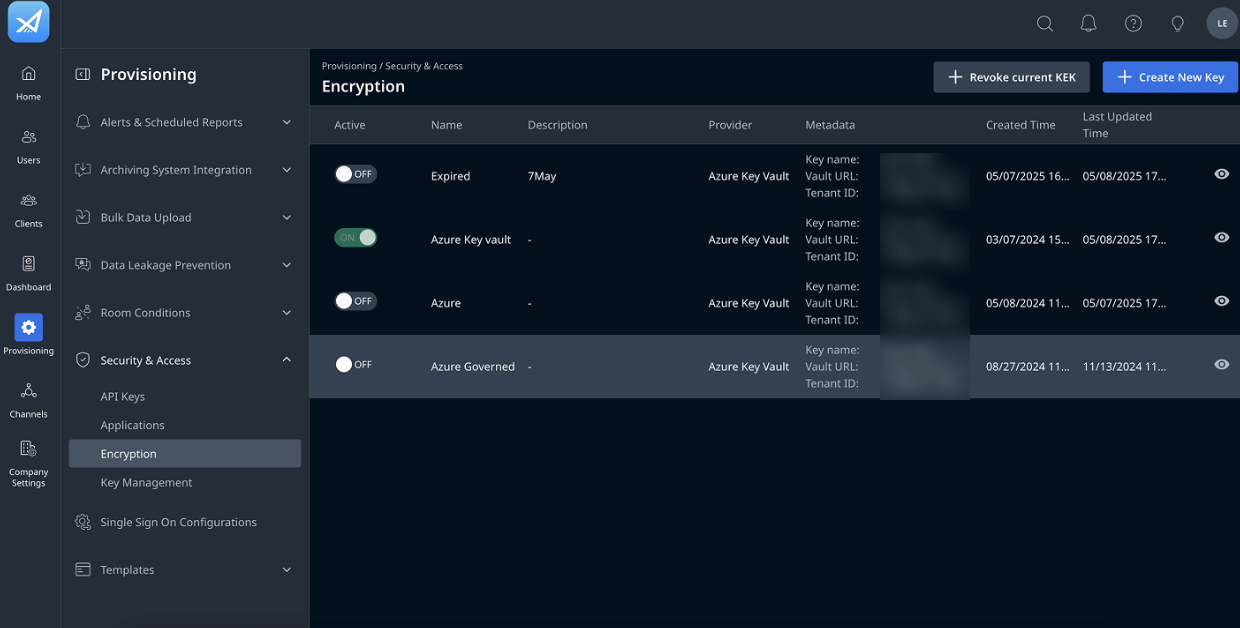
- Log in to the LeapXpert Org Admin portal.
- Go to Provisioning > Security & Access > Encryption.
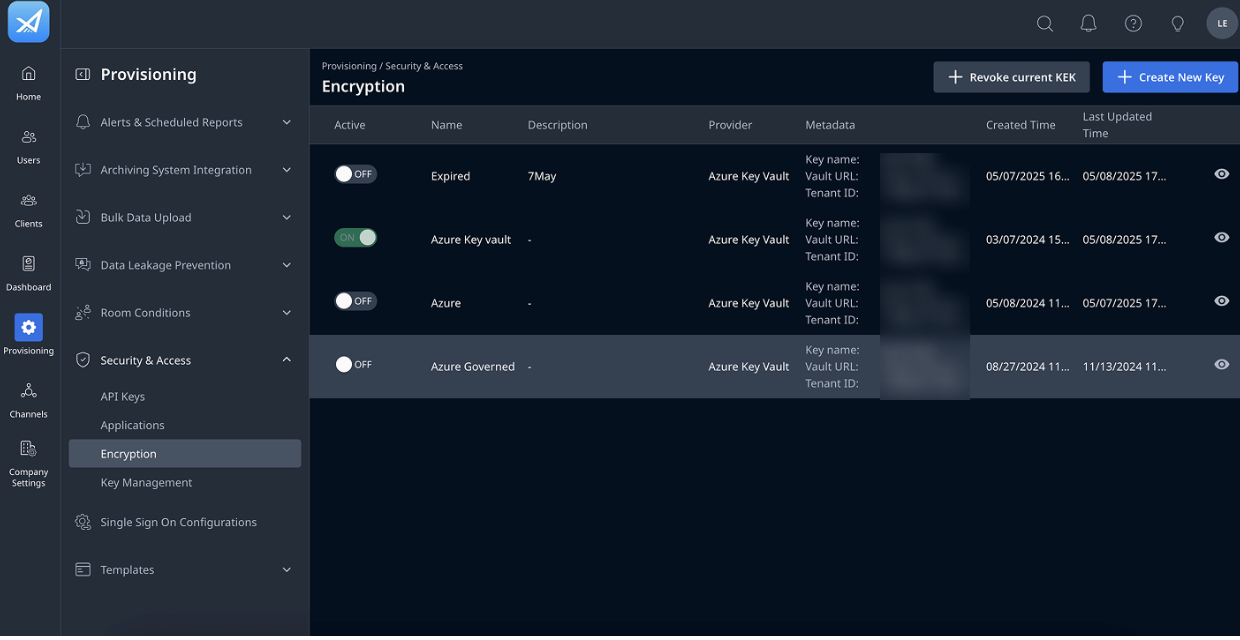
- Click + Create New Key.
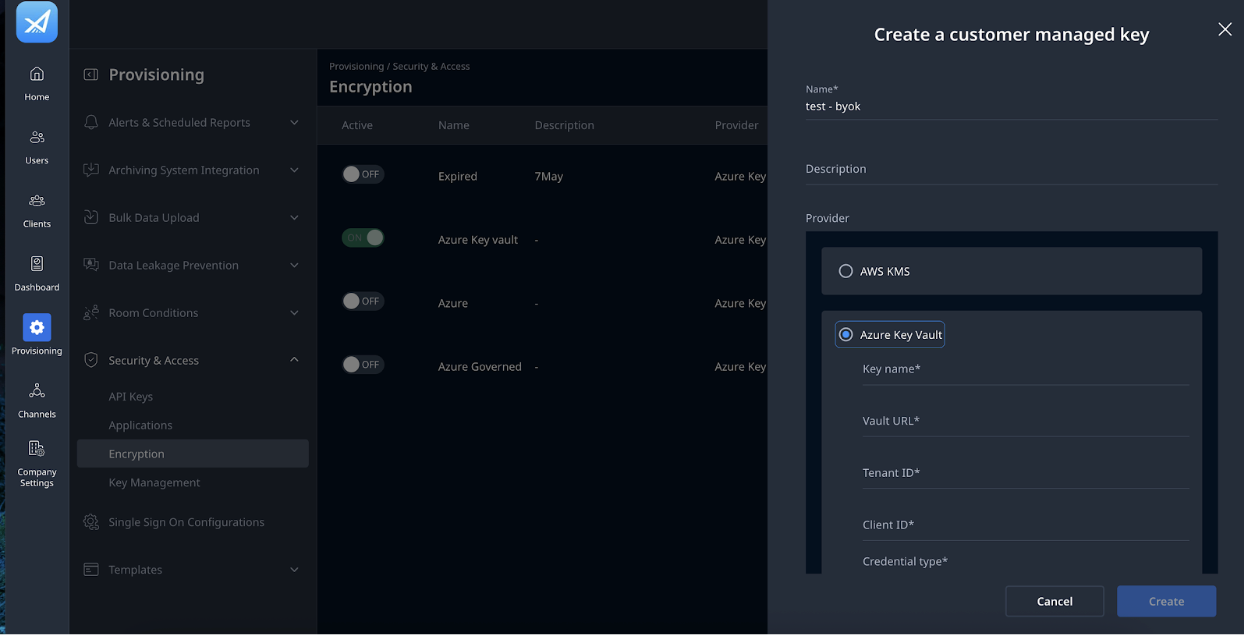
- In Create a customer managed key, enter Name and (optional) Description.
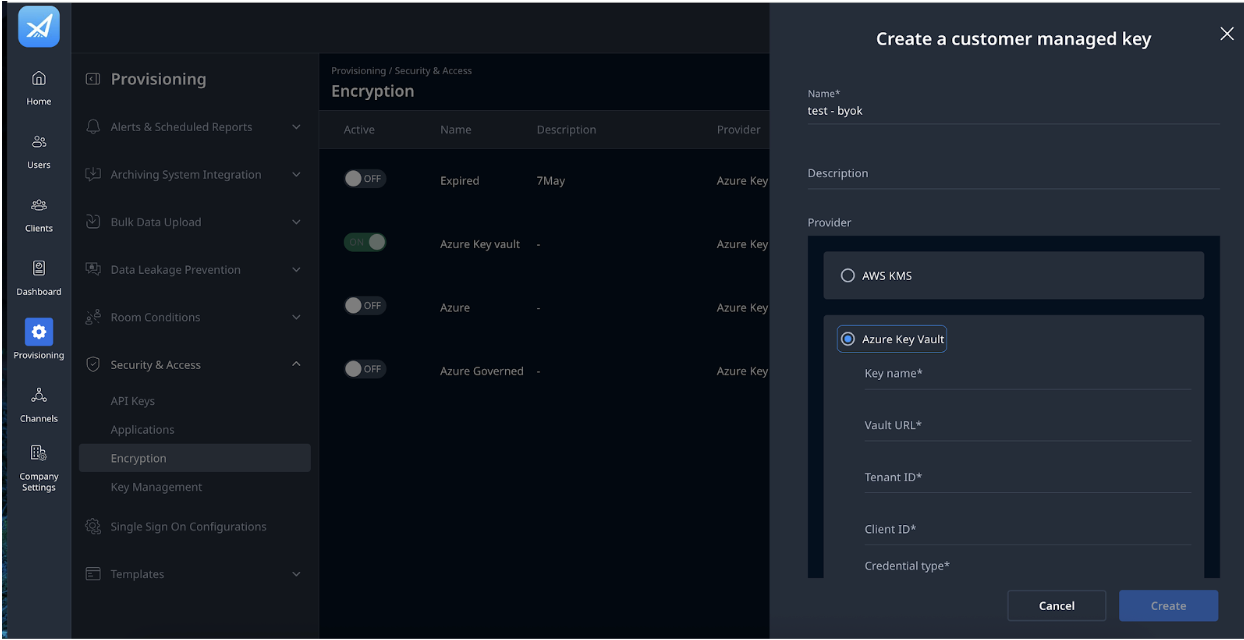
- Select Azure Key Vault and fill in:
- Key name
- Vault URL
- Tenant ID
- Client ID
- Credential type: Secret or Certificate
- Click Create.
- Click Enable BYOK (top right).
Option B — Connect to customer Azure tenant with Private Link
-
Run the following in Azure CLI:
az keyvault list --query "[].{Name:name, ResourceID:id, Subscription:subscriptionId, Region:location}" -o table. -
Write down required values from the Azure CLI output or from your Azure Portal, collect the following:
- Key Vault Name:
<key-vault-name> - Key Vault Key Name:
<key-name> - Key Vault URI:
https://<key-vault-name>.vault.azure.net/ - Resource Path (long Azure path):
/subscriptions/<subscription-id>/resourceGroups/<resource-group-name>/providers/Microsoft.KeyVault/vaults/<key-vault-name> - Subscription ID:
<subscription-id>
- Collect App Registration details
- Tenant ID
- Application (Client) ID
- Client Secret (if you’re using a password to connect — optional if using certificate)
- Send the information from steps (1) and (2) to LeapXpert.
LeapXpert will use this information to initiate the Private Link connection. - Once LeapXpert finishes the process, log in to your Azure Portal.
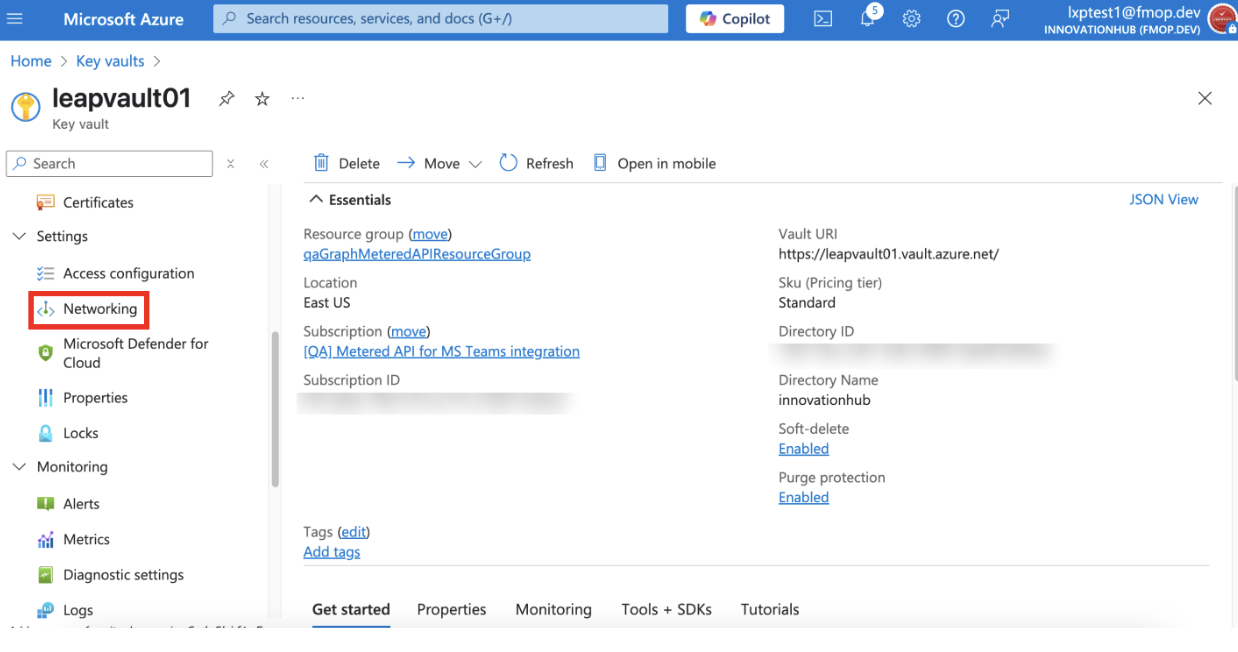
- Go to your Key Vault.
- Under Settings, click Networking.
- Choose Private Endpoint Connections.
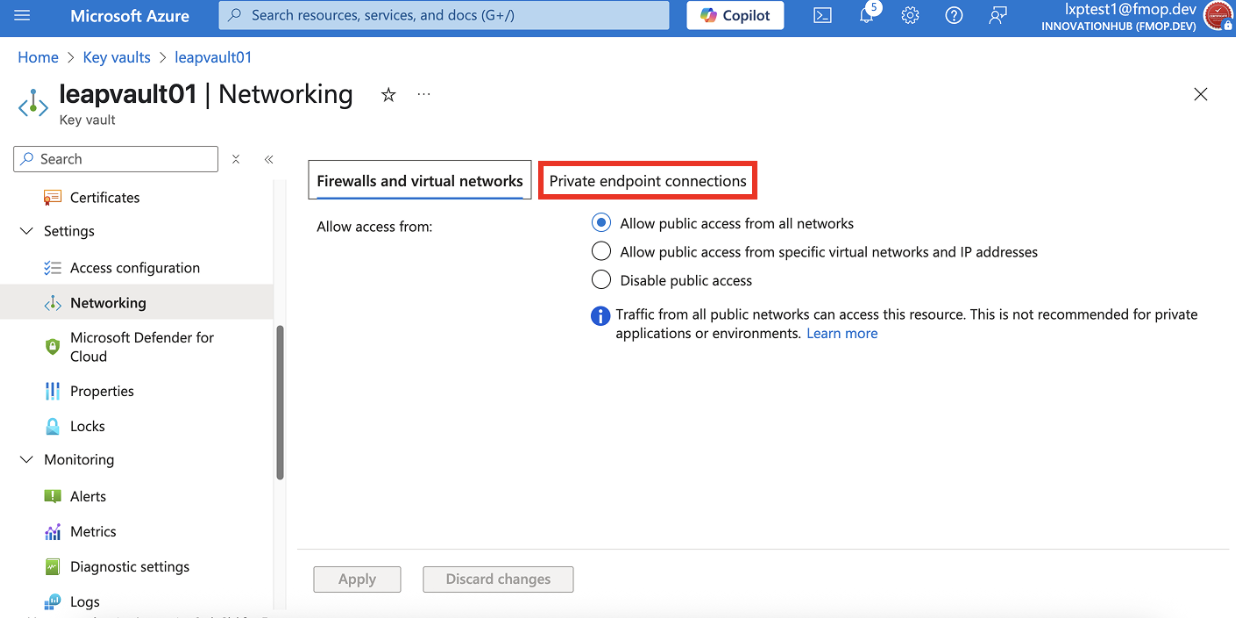
- You will see a pending request from LeapXpert.
- Click it and approve the request.
Note
Make sure the status becomes Approved (both in your Azure Portal and in LeapXpert).
- After the link is approved, you will get a few final values to configure on LeapXpert’s Org Admin portal.
| Attribute | Example |
|---|---|
| Key Name | encryption-key-1 |
| Key Vault URL | https://my-keyvault-prod.privatelink.vaultcore.azure.net |
| App Registration ID | <Application (Client) ID> |
| Tenant ID | <Directory (Tenant) ID> |
| Client Secret | (Optional, if you’re using it) |
- Log in to the LeapXpert Org Admin portal.
- Go to Provisioning > Security & Access > Encryption.
- Click + Create New Key.
- Select Azure Key Vault and fill in the values from the table above.
- Click Create.
- Click Enable BYOK.
✅ You have successfully configured the BYOK integration with Azure Key Vault.